Just before the Chinese Lunar New Year, I received the latest alpha version of AirVision 2.0. It doesn’t just inherit the strengths of the previous version; it feels significantly faster and more stable. Here is a quick preview of the installation process and some of the main UI pages.
Installation Process
After launching the Windows installer and following the setup steps, you’ll see a Windows Security alert. Make sure your firewall isn’t blocking the application.
The AirVision controller runs in the system tray. Click “Launch a Browser” to start the web interface for further configuration.

First-Time Configuration
-
Host Setup: Enter the host PC name, select your language, and set your location.

-
Account Creation: Create an administrator account to access AirVision.

-
Controller Setup: Add a controller if needed, or simply skip to the next step.

Main Interface & Camera Management
Once logged in, you can see the dashboard. Managing cameras is straightforward: click on the “unmanaged” part of the camera section to see a list of available devices.

The Map view allows for intuitive placement of cameras. You can drag and drop cameras onto the map, and just like in previous versions, the color changes when motion is detected.

Features & Statistics
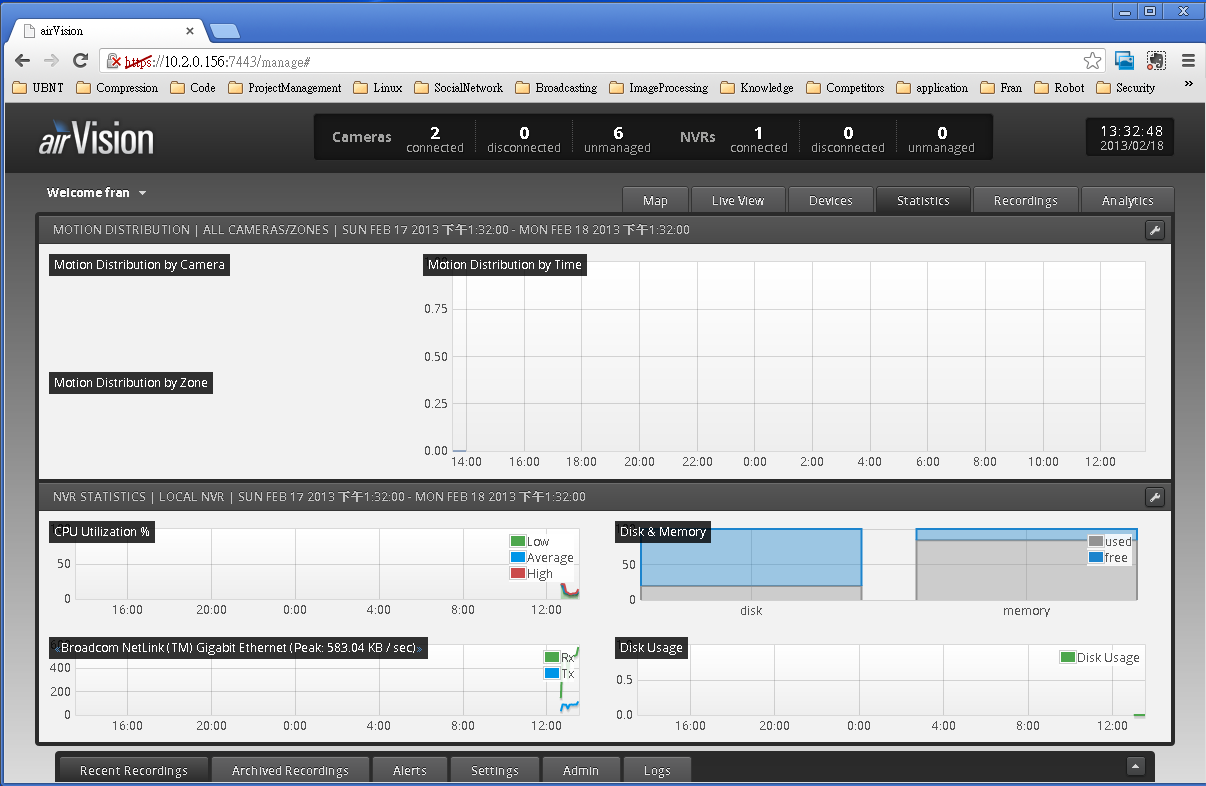
The new interface offers detailed Analytics, Statistics, and a robust Recording management page. The toggle bar at the bottom provides a wealth of system information at a glance.
After a quick run-through, AirVision 2.0 has really exceeded my expectations. I’m looking forward to its official launch.
For context, here is a video demo of the previous version for comparison: YouTube Demo Link
Comments & Feedback